
1. Install the Connector
For your Sales Point system to be able to accept orders, you need to install the bessa Connector.
-
x3000 – Set up x3000 – then install the Connector.
-
Gastrotouch – install the Connector – then install the bessa Uploader.
-
diekassa – the bessa Connector is integrated directly.
2. Order Settings
After preparing the Sales Point, configure the order-type settings.
In bessa Manager, open the Order Settings menu item. Then click on Order Type Settings and set up the desired order type(s).
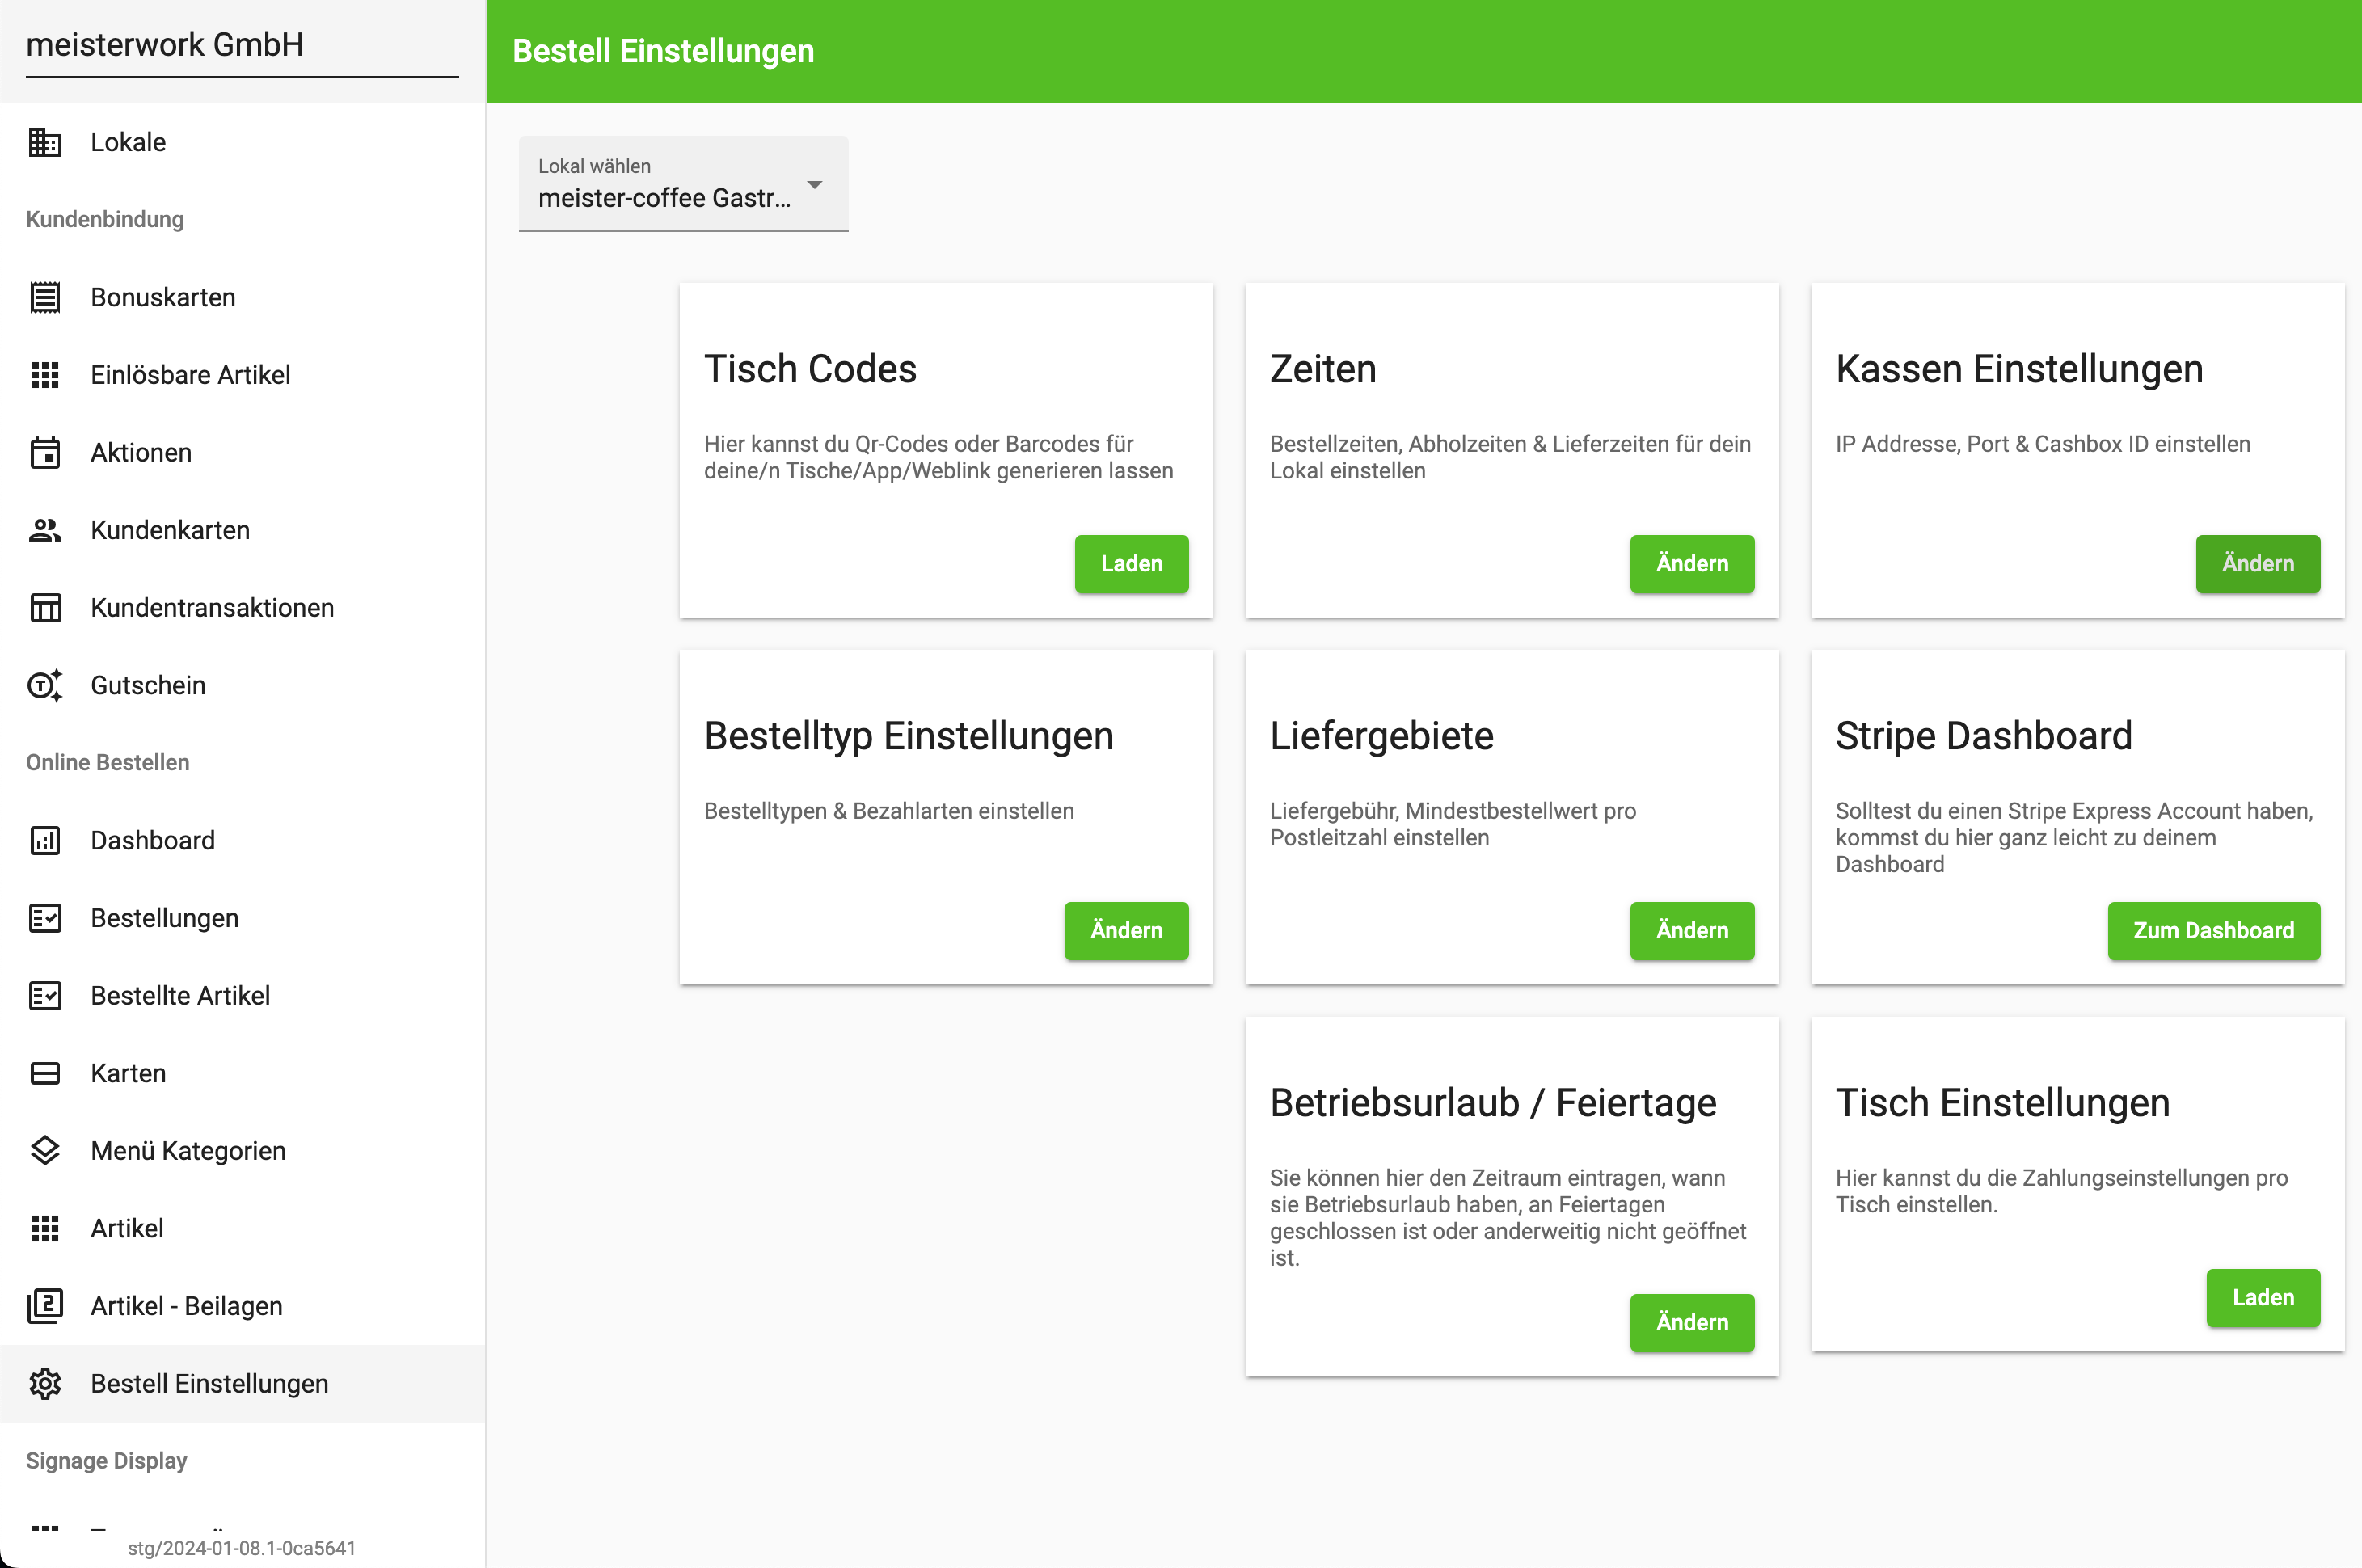
Clicking Order Type Settings opens a dialog in which you can specify how orders are processed and how the ordering system should behave. The bessa Manager documentation provides more detail about the functionality of the individual fields.
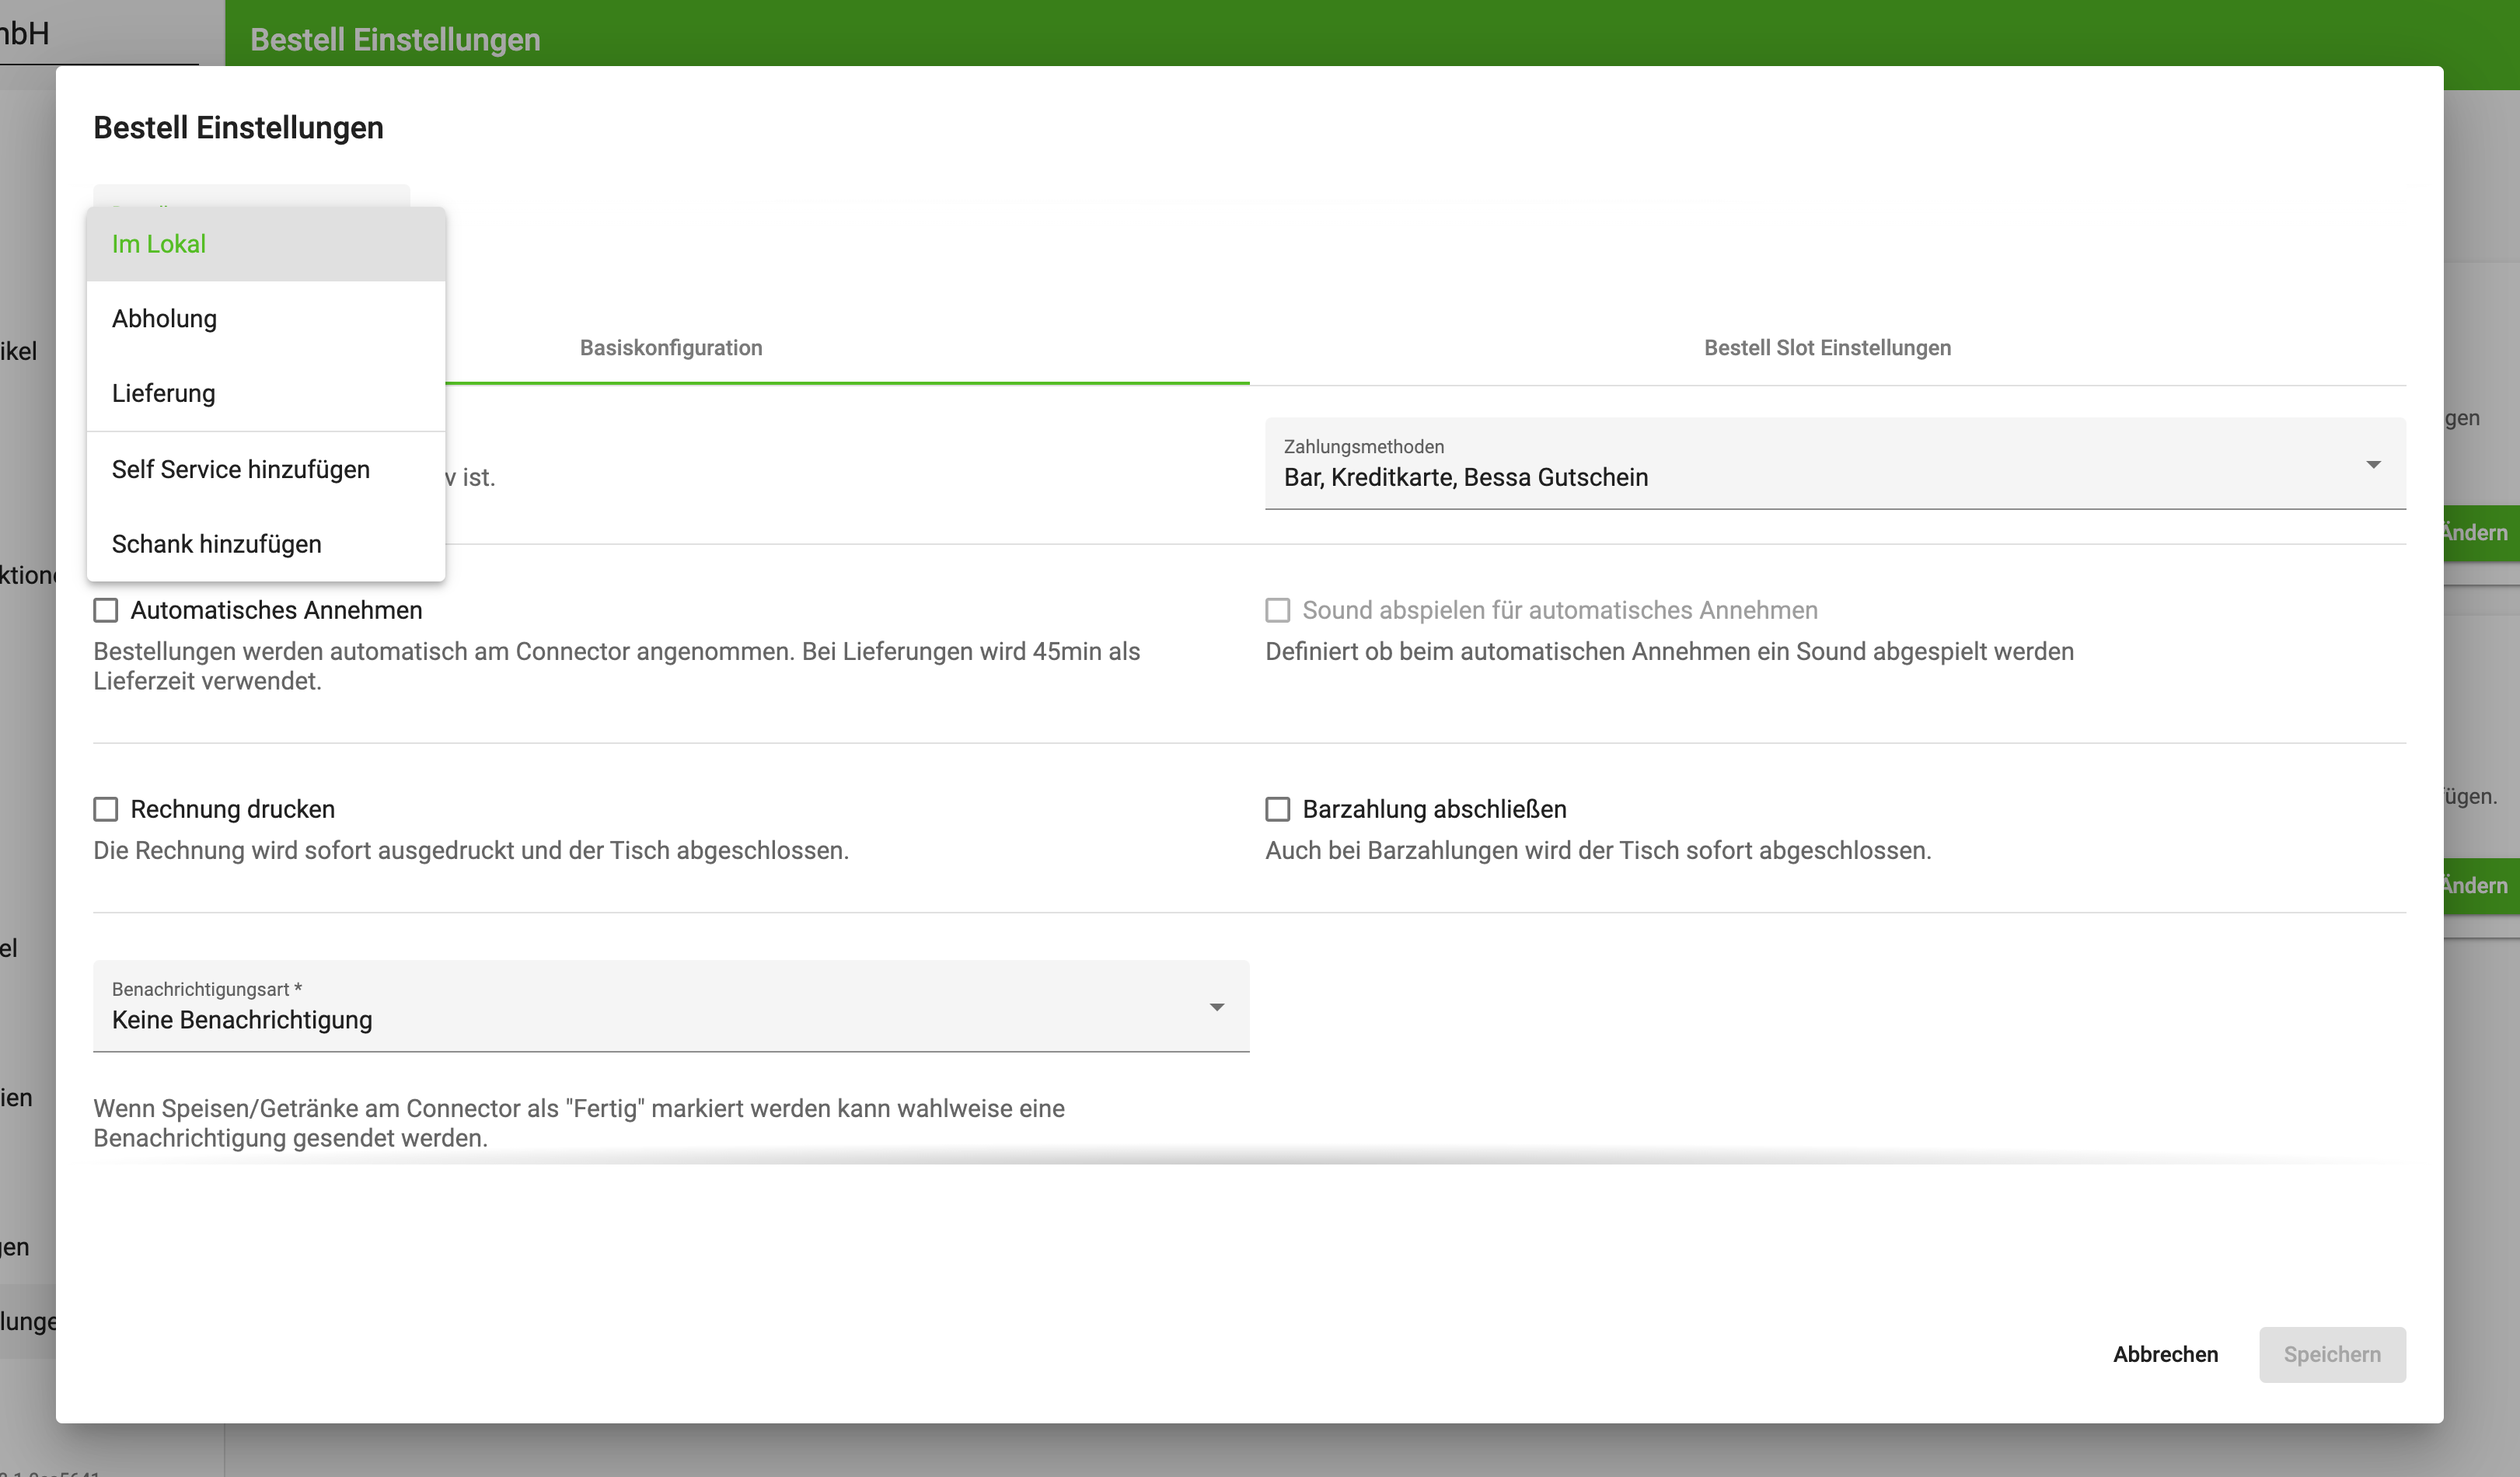
At least one of the following 3 order types must be enabled for app and web orders to work properly.
-
On premise – table orders via QR code
-
Pickup
-
Delivery
For kiosk or tablet orders, the Self Service order type must be enabled.
For dispenser orders, there is the Dispenser order type. This must be enabled for dispenser operation.
Just click Add and this order type is created automatically. The order type still needs an active payment method and a menu. The possible payment methods were sent to the customer during the order; the customer must then activate them to allow online payments.
Set Order Times
The customer must also define the order times via the Times tile. Once the times are entered, the App Orders module is operational.
If you have further questions, contact support@bessa.app.